Category: Tools

  • Using Grammar and Spell Check Tools

    Using Grammar and Spell Check Tools

    I was sitting in a high-stakes strategy meeting last year, watching a senior partner present a slide deck that was riddled with embarrassing typos. It wasn’t just a distraction; it was a credibility killer. We spend so much time obsessing over high-level logic and workflow architecture, yet we let small, avoidable errors undermine the entire foundation of our professional authority. Most people think they need some expensive, AI-driven overhaul to fix their writing, but the truth is that most spell check tools on the market today are just adding to the digital noise rather than actually clearing it.

    I’m not here to sell you on a shiny new subscription or a complex suite of features you’ll never use. My goal is to help you find the right friction-less systems that actually serve your workflow without demanding constant attention. I’ve vetted the options, from the basic built-ins to the more robust professional editors, to see which ones truly handle the small stuff so you can stay focused on the big ideas. We’re going to strip away the hype and focus on the tools that help you reclaim your focus and maintain your professional edge.

    Table of Contents

    Beyond Basic Spelling and Punctuation Checkers

    Beyond Basic Spelling and Punctuation Checkers.

    If you’re still relying solely on basic red squiggly lines to catch your mistakes, you’re only seeing half the picture. I’ve seen too many professionals treat their writing like a checklist of typos, when the real goal should be improving writing clarity and impact. Modern digital writing assistants have moved far past simple spelling and punctuation checkers; they now act more like a second set of eyes that can sense when your tone is drifting or your sentences are becoming needlessly convoluted.

    Think of it as moving from a simple filter to a full-scale quality control system. Using advanced automated proofreading software allows you to catch subtle nuances—like passive voice or repetitive phrasing—that a standard check would completely miss. I prefer tools that offer real-time writing assistance because they allow me to course-correct mid-thought, rather than forcing me to go back and perform a tedious autopsy on a finished draft. It’s about building a smoother, more intentional workflow where the technology handles the mechanics, leaving you free to focus on the actual substance of your message.

    Automated Proofreading Software That Respects Your Time

    Automated Proofreading Software That Respects Your Time

    If you’re tired of constant interruptions, you need to look toward automated proofreading software that works quietly in the background rather than screaming at you every time you miss a comma. I’ve seen too many professionals lose their creative momentum because they’re stuck in a cycle of manual correction. The goal isn’t to have a computer fix every single word; it’s to use digital writing assistants that handle the mechanical heavy lifting so your brain can stay focused on the actual strategy.

    The best tools in this category provide real-time writing assistance without being intrusive. I prefer systems that offer subtle cues rather than those that halt my workflow with aggressive pop-ups. When the software focuses on improving writing clarity and structural flow instead of just flagging typos, it stops being a distraction and starts being a genuine partner in your process. You want a tool that acts like a silent editor sitting in the room with you—someone who catches the slip-ups so you can maintain your rhythm and get back to the work that actually moves the needle.

    How to make these tools work for you, not against you

    • Stop treating every red underline like a personal failure. Use spell checkers to catch the mindless typos so you can save your mental energy for the actual architecture of your argument.
    • Disable the “aggressive” settings. If a tool is constantly flagging your industry-specific terminology or names, it’s just adding noise. Tune your dictionary so the software learns your vocabulary instead of fighting it.
    • Never trust a machine with your tone. A tool can tell you if a word is spelled correctly, but it can’t tell you if you sound condescending or rushed. Always do a final human pass to ensure your voice remains intact.
    • Use them as a safety net, not a crutch. If you rely entirely on automated proofreading, you’ll stop developing your own editorial eye. The goal is to use the tool to catch the slips, not to outsource your thinking.
    • Integrate, don’t add. Don’t go hunting for a standalone app that requires a separate login and a different workflow. Pick a tool that lives where you already work—whether that’s your browser or your word processor—to minimize friction.

    Cut the noise and focus on what matters

    Stop treating spell checkers like a crutch; use them as a safety net so you can spend your mental energy on the actual substance of your work.

    Avoid the trap of “feature creep” by choosing one reliable proofreading tool that fits your existing workflow rather than juggling five different apps.

    Remember that the goal isn’t perfection for perfection’s sake—it’s about removing the small, distracting errors that undermine your professional authority.

    ## The goal isn't perfection, it's momentum

    “I don’t care if your prose is flawless; I care that it’s clear. Use spell check to catch the mindless errors that trip you up, but don’t let a software’s rigid rules become a barrier to your actual thinking. A tool should clear the path, not act as a roadblock.”

    Emmett Kowalski

    Finding Your Flow

    Finding Your Flow with automated proofreading tools.

    At the end of the day, the goal isn’t to find the most expensive or feature-heavy software on the market. We’ve looked at how moving beyond basic red underlines and into automated proofreading can save you from the mental fatigue of constant self-correction. Whether you’re using a lightweight extension or a robust AI-driven editor, the objective remains the same: choose a tool that integrates into your existing workflow without adding new layers of friction. Don’t let the pursuit of the “perfect” tool become another item on your to-do list. Pick something that works, set it and forget it, and let it handle the technical minutiae so you can get back to the actual work that requires your brainpower.

    I’ve spent a lot of my career watching people get lost in the “optimization trap,” constantly swapping out one system for another in a desperate search for more time. But true efficiency isn’t about the software; it’s about the intentionality you bring to your process. Use these tools to clear the clutter and catch the small errors, but never let them replace your own critical eye or your unique voice. When you stop worrying about the mechanics of every sentence, you finally create the mental space needed for deep work. Use the tech to serve your vision, not to define it.

    Frequently Asked Questions

    How do I know if these tools are actually improving my writing or just making me lazy with my editing?

    It’s a fair question. If you’re clicking “accept all” without reading, you aren’t using a tool; you’re outsourcing your brain. I look at it this way: a tool should be a safety net, not a crutch. If you’re using the suggestions to understand why a sentence felt off, you’re learning. If you’re just blindly following red underlines to get to the next task, you’re losing your edge. Use them to polish, not to think.

    Is it worth paying for a premium subscription, or can I get by with the free versions built into my browser?

    Look, if you’re just drafting casual emails or internal memos, the browser tools are fine. They do the heavy lifting without the overhead. But if your work involves client-facing deliverables or complex documentation, the free versions will eventually let you down. I view a premium subscription as an investment in your professional reputation. Pay for the tool that catches the nuance, not just the typos, so you can stop second-guessing yourself.

    Will using these automated tools compromise the privacy of my sensitive professional documents?

    It’s a valid concern, and honestly, it’s one I take seriously. When you feed a document into a cloud-based tool, you’re essentially handing your data to a third party. If you’re handling proprietary client info or sensitive legal briefs, the “free” version of an app might not be worth the risk. Always check the privacy policy for data-retention clauses. If the stakes are high, stick to local, offline editors or enterprise-grade tools with ironclad security.

  • The 7 Best Top Rated Software for Organizing Personal Digital Files to End Your Chaos

    The 7 Best Top Rated Software for Organizing Personal Digital Files to End Your Chaos

    I’ve spent most of my career cleaning up the operational messes left behind by people who thought “more tools” meant “more progress.” Lately, I see that same chaos creeping into our personal lives; we’re drowning in a sea of unorganized PDFs, duplicate photos, and scattered documents that feel more like a burden than a resource. Most people spend more time searching for what they need than actually using it, which is a massive drain on your mental bandwidth. Finding the top rated software for organizing personal digital files isn’t about finding the flashiest new app on the market; it’s about finding a reliable system that finally lets you stop fighting your own hardware.

    In this post, I’m cutting through the marketing fluff to give you a curated list of seven tools that actually deliver on their promises. I’ve selected these specifically because they prioritize functionality over features, ensuring you spend less time managing your software and more time living your life. By the end of this list, you’ll have a clear roadmap to reclaiming your digital space and building a workflow that actually serves you.

    The Reliable Backbone: Dropbox

    The Reliable Backbone: Dropbox file synchronization.

    I’ve seen countless professionals lose hours of work because they relied on flimsy, unproven storage solutions. Dropbox isn’t the flashiest tool on the market, but it is a workhorse that does exactly what it says on the tin. It excels at one thing: keeping your files synchronized across every device you own without making you jump through hoops.

    The All-in-One Architect: Notion

    Notion is a bit of a double-edged sword in my book. On one hand, it offers an incredible amount of flexibility that allows you to build a custom digital headquarters. On the other hand, if you aren’t careful, you can spend more time fiddling with layouts than actually organizing your life. I tell my clients to approach it with a strict sense of purpose.

    The Creative’s Vault: Adobe Creative Cloud

    If your “digital files” consist mostly of high-resolution assets, design files, or video projects, you can’t afford to use generic consumer tools. Adobe’s ecosystem is built specifically for the heavy lifting required by creative professionals. It’s expensive, yes, but the seamless integration between their storage and their editing suites is worth the investment for anyone serious about their craft.

    The Seamless Integrator: Google Drive

    We’ve all been there—stuck in an endless loop of emailing attachments back and forth. Google Drive solved that headache years ago, and for good reason. Its greatest strength isn’t just the storage capacity, but the collaborative frictionlessness it provides. It turns file management from a solitary chore into a shared, real-time experience.

    The Privacy Fortress: Proton Drive

    There is a growing segment of my clients who are rightfully concerned about data privacy and the “big tech” gaze. If you are handling sensitive legal documents, financial records, or private personal data, you need more than just a cloud folder; you need end-to-end encryption. Proton Drive is the gold standard for those who prioritize security above all else.

    The Knowledge Repository: Evernote

    I’ve always believed that our brains aren’t meant to be filing cabinets; they are meant to be processors. Evernote is designed to act as that external filing cabinet for your thoughts and documents. It’s particularly effective for the “collector” type who needs to capture everything from a scanned receipt to a handwritten note from a meeting.

    The Desktop Purist: macOS Finder / Windows File Explorer

    Before you go out and subscribe to another monthly service, I want you to look at what you already have. The native file management systems built into your computer are often the most efficient tools available. They are fast, they are local, and they don’t require an internet connection to function. Most people struggle with organization not because their software is bad, but because their folder hierarchy is a mess.

    Finding Your Flow

    At the end of the day, whether you opt for the heavy-duty structure of a dedicated file manager or the streamlined simplicity of a cloud-based ecosystem, the goal remains the same: reducing friction. We’ve looked at tools that handle everything from deep metadata tagging to seamless cross-device syncing, but remember that no software can fix a broken habit. The best tool is the one that integrates into your existing routine without requiring a manual for survival every time you want to find a single PDF. Don’t feel pressured to implement every feature at once; start with one reliable system and build your architecture slowly so it actually holds up under the weight of your real-world workload.

    I spent years watching people drown in digital chaos because they thought the next “magic” app would solve their problems. It won’t. Real organization isn’t about achieving a state of perfect, sterile digital minimalism; it’s about creating enough breathing room so that your technology disappears into the background. When your files are where they belong, you stop hunting and start actually working. Stop chasing the shiny new update and focus on building a system that serves you, leaving you with more mental energy for the things that truly matter.

    Beyond the software itself, I’ve learned that staying organized is as much about mental clarity as it is about folder structures. When the digital clutter starts feeling heavy, I find it helps to step away from the screen and engage in some meaningful, human connection to reset my focus. If you’re looking for a way to decompress and find some genuine conversation outside of your workspace, checking out matureladies chat can be a great way to reclaim your headspace and remind yourself that there is a world much larger than your desktop files. Sometimes, the best way to organize your life is to simply take a breath and reconnect.

  • The 7 Best Digital Tools for Remote Team Project Management to Scale Your Workflow

    The 7 Best Digital Tools for Remote Team Project Management to Scale Your Workflow

    I’ve spent most of my career watching brilliant teams buckle under the weight of their own software. You see it everywhere: a company buys a premium subscription, spends three weeks “onboarding,” and suddenly everyone is spending more time updating status bars than actually doing their jobs. We’ve reached a point of digital exhaustion where we mistake activity for progress. When you’re searching for the best digital tools for remote team project management, the goal shouldn’t be to find the one with the most bells and whistles. It should be about finding the tools that actually reduce your mental load and let you focus on the work that moves the needle.

    In this post, I’m cutting through the marketing fluff to bring you my curated shortlist of seven essential platforms. I’m not looking for the trendiest apps on Product Hunt; I’m looking for the heavy lifters that provide stability and clarity. You’ll learn which tools offer the right balance of structure and flexibility to keep your distributed team aligned without the constant digital noise. Let’s stop chasing every new notification and start building systems that actually work.

    Asana for Structural Clarity

    Using Asana for Structural Clarity.

    If your team feels like they are constantly drowning in “who is doing what” questions, Asana is usually the remedy. I’ve seen countless projects derail simply because the ownership of a task was vague, and Asana forces that clarity by design. It’s not about adding more complexity; it’s about creating a single source of truth where every milestone has a face and a deadline attached to it.

    Trello for Visual Simplicity

    Sometimes, the most sophisticated solution is actually the most basic one. Trello operates on a Kanban system that feels incredibly intuitive, almost like moving physical sticky notes across a whiteboard in a conference room. For teams that need to visualize the flow of work from “To Do” to “Done” without a steep learning curve, this is often the most efficient choice.

    Monday.com for Customizable Workflows

    Monday.com is for the teams that know exactly how they want to work and need a platform that can actually bend to their will. It is highly visual and incredibly flexible, allowing you to build out columns and automations that mirror your specific operational logic. If your workflow isn’t a standard “left-to-right” process, this is where you find your operational rhythm.

    Notion for Centralized Knowledge

    Most remote teams suffer from “information fragmentation”—half the context is in an email, some is in a chat, and the rest is lost in someone’s head. Notion solves this by acting as a hybrid between a project manager and a digital wiki. It allows you to house your project tasks right alongside the supporting documentation and meeting notes that give those tasks meaning.

    ClickUp for All-in-One Integration

    ClickUp makes a bold promise: to replace every other app in your stack. While I usually advocate for minimalism, there is a legitimate efficiency to having your docs, goals, and tasks under one roof. It’s a powerhouse for teams that want to minimize context switching, which is the mental tax you pay every time you jump between different browser tabs.

    If you are managing a software development team, trying to use a generalist tool is like trying to perform surgery with a kitchen knife. Jira is built specifically for the rigors of agile development and technical workflows. It handles the granular details of sprints, backlogs, and bug tracking with a level of precision that general tools simply can’t match.

    Basecamp for Calm Communication

    There is a specific kind of chaos that comes with remote work—the constant, frantic “pinging” of instant messages. Basecamp takes a fundamentally different approach by prioritizing organized communication over real-time urgency. It’s designed to give you a sense of calm, grouping discussions around specific projects rather than letting them float aimlessly in a chat window.

    The Bottom Line

    At the end of the day, whether you lean toward the robust structure of Asana or the visual simplicity of Trello, the tool itself is secondary to the process it supports. We’ve looked at how different platforms handle communication, task tracking, and documentation, but remember that no software can fix a broken workflow. If your team isn’t communicating clearly, a new dashboard is just a digital coat of paint on a crumbling house. Use these tools to bridge the distance of remote work, but ensure you are choosing the ones that actually reduce your mental load rather than adding another layer of administrative clutter to your plate.

    Don’t let the pursuit of the “perfect” tech stack become a form of procrastination. I’ve seen countless teams stall out because they spent months debating software features instead of actually doing the work. Pick a system that feels intuitive, set some ground rules for how you use it, and then get out of the way. Real productivity isn’t found in a complex feature set or a flashy interface; it’s found in the clarity and space you create to do your best work. Stop chasing the hype and start building systems that serve you.

    Before you commit to a full-scale rollout of any new software, I always suggest doing a quick audit of your current team’s capacity to actually handle the change. It’s easy to get swept up in the technical side of things, but the human element is where most implementations fail. If you’re finding yourself needing to recalibrate your local connections or simply looking for a way to balance your professional focus with your personal life, sometimes even small shifts like checking out w4m perth can help you find that much-needed social equilibrium outside of the screen. At the end of the day, sustainable productivity requires a life that exists beyond your task manager.

  • Stop Buying More Gear and Start Mastering What You Own: How to Maintain High Quality Kitchen Knife Sets for a Lifetime of Utility.

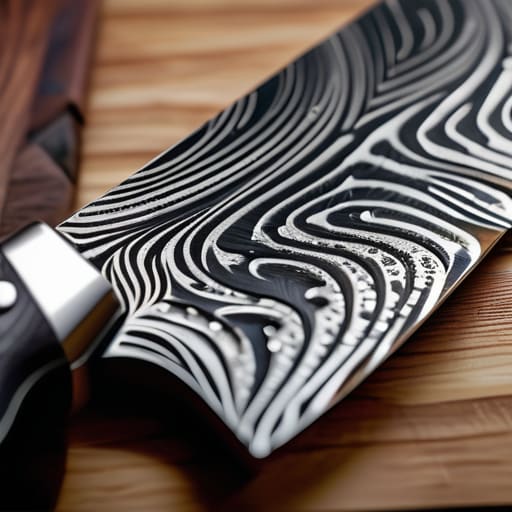
    Stop Buying More Gear and Start Mastering What You Own: How to Maintain High Quality Kitchen Knife Sets for a Lifetime of Utility.

    I was mid-way through restoring a teak sideboard last weekend when I realized my mind had drifted back to a frustrating dinner party a few months ago. I was trying to prep a simple mirepoix, but I was essentially sawing through onions with a blade that felt more like a blunt chisel than a precision tool. It’s a common trap: people spend a small fortune on professional-grade steel only to treat it like a common utility knife, completely ignoring how to maintain high quality kitchen knife sets until the edge is long gone. Most of the “expert” advice out there is just noise—expensive gadgetry and complicated sharpening rituals that add more clutter to your counters than actual value to your kitchen.

    I’m not here to sell you a subscription to a gadget club or a specialized stone for every single blade you own. My goal is to give you a functional system that respects your time and your tools. I’m going to show you the exact, streamlined workflow I use to keep my knives performing at their peak without turning maintenance into a second job. We’re going to cut through the fluff and focus on the only habits that actually matter for long-term edge retention.

    The Best Way to Clean Professional Knives Without Ruining Them

    The Best Way to Clean Professional Knives Without Ruining Them

    The biggest mistake I see people make is treating their knives like standard silverware. If you’re tossing a high-end blade into a dishwasher, you’re essentially sabotaging your investment. The high heat and aggressive detergents are a recipe for disaster; they don’t just dull the edge, they can actually lead to preventing knife blade corrosion by stripping away the protective finishes.

    The best way to clean professional knives is far more manual and, frankly, much more respectful. I always advocate for the hand-wash method: warm water, a mild soap, and a soft sponge. Clean the blade immediately after use. If you let moisture sit on the surface—especially if you’re protecting high carbon steel edges—you’re asking for rust spots that are a nightmare to buff out. Once they’re clean, dry them thoroughly with a lint-free cloth before putting them away. It takes an extra sixty seconds, but it ensures your tools are ready to work when you are, rather than becoming a chore you have to fight against.

    Protecting High Carbon Steel Edges From Constant Corrosion

    If you’ve moved beyond basic stainless steel and invested in high-carbon blades, you’ve essentially invited a living thing into your kitchen. These knives are superior because of their edge retention, but that same chemistry makes them incredibly temperamental. The moment you leave a carbon steel blade sitting damp in a sink, you’re inviting oxidation. Preventing knife blade corrosion isn’t about a complex ritual; it’s about discipline. You have to dry them immediately—not with a dish towel that’s been sitting in the laundry, but with a clean, dry cloth—and ideally, apply a tiny drop of food-grade mineral oil to the surface after each use.

    Think of it like maintaining the finish on a piece of vintage walnut; if you neglect the seal, the wood suffers. The same applies here. If you find yourself fighting rust spots, don’t panic, but do make a habit of protecting high carbon steel edges as part of your standard closing workflow. It takes thirty seconds, but it saves you the headache of a pitted, ruined blade that no amount of honing can fix.

    Five Habits to Keep Your Blades Working for You

    • Stop using your knives as a substitute for a kitchen tool; if you need to crack a nut or chop through a frozen block of meat, grab a mallet or a cleaver instead. Using a fine edge for tasks it wasn’t built for is the fastest way to ruin a good investment.
    • Invest in a decent wooden knife block or magnetic strip rather than tossing them in a cluttered drawer. Metal-on-metal contact is a silent killer for your edges, and a dedicated home for each blade prevents unnecessary nicks and scratches.
    • Learn the difference between honing and sharpening. Most people think they need to sharpen their knives every week, but a regular pass with a honing rod is usually all you need to realign the edge and keep it performing smoothly between actual sharpenings.
    • Get comfortable with a whetstone. While many people reach for those cheap pull-through sharpeners, they tend to be too aggressive and can chew up your steel. A little time spent with a stone is a small price to pay for a blade that stays surgical for years.
    • Check your cutting surfaces. If you’re still using glass or marble boards, stop immediately. Those surfaces are essentially sandpaper for your knife edges; stick to wood or high-quality end-grain boards to give your steel a fighting chance.

    Respect the Tools, Master the Craft

    At the end of the day, maintaining a professional knife set isn’t about following a complex manual; it’s about building a simple, sustainable habit. We’ve covered the essentials: stop throwing your blades in the dishwasher, learn to handle high-carbon steel with the respect it deserves to prevent corrosion, and keep your cleaning process focused on immediate care. When you commit to these small, intentional steps, you aren’t just preserving metal and wood; you are protecting your investment and ensuring that your tools are always ready when you are. Don’t let your equipment become a source of friction in your kitchen. When you take care of your knives, they take care of you.

    I’ve spent a lot of my career looking for efficiency, and I’ve learned that the most effective systems are often the simplest ones. A well-maintained knife is more than just a utensil; it’s an extension of your intent. When the edge is sharp and the blade is clean, the act of cooking shifts from a chore into a flow state. Stop chasing the latest gadget and start honoring the tools you already own. If you treat your knives with intention, you’ll find that the work itself becomes more precise, more enjoyable, and significantly less taxing on your mind. Now, go sharpen those blades and get back to what actually matters: making something great.

    If you find yourself feeling overwhelmed by the sheer volume of specialized care instructions for different blade steels, don’t let the technical jargon paralyze you. Sometimes, the best way to clear that mental clutter is to simply ask for a direct breakdown of the facts. I often find that using this chat site helps me quickly distill complex maintenance schedules into a simple, actionable checklist that I can actually follow without second-guessing myself. It’s much better to have a clear plan of action than to spend your evening staring at a manual you’ll never finish reading.

  • The 7 Best Essential Woodworking Tools for Beginner Home Workshops

    The 7 Best Essential Woodworking Tools for Beginner Home Workshops

    I’ve spent most of my life streamlining workflows, and if there’s one thing I’ve learned, it’s that complexity is often just a mask for inefficiency. When people tell me they want to start woodworking, they usually show up with a mental shopping list that looks more like a hardware store inventory than a practical plan. They get paralyzed by the sheer volume of shiny, expensive machinery, forgetting that the goal is to actually build something, not just collect gear. If you want to avoid the trap of overspending on things you’ll never use, you need to focus on the foundational essential woodworking tools for beginner home workshops that actually move the needle.

    In this guide, I’m stripping away the digital noise and the marketing hype to give you a lean, functional starting point. I’ve curated a list of exactly seven items that prioritize utility over novelty. By the time you finish reading, you won’t just have a shopping list; you’ll have a clear roadmap for setting up a workspace that respects your budget and your sanity. Let’s stop chasing the gadget high and start focusing on the tools that actually get the job done.

    A Solid Workbench

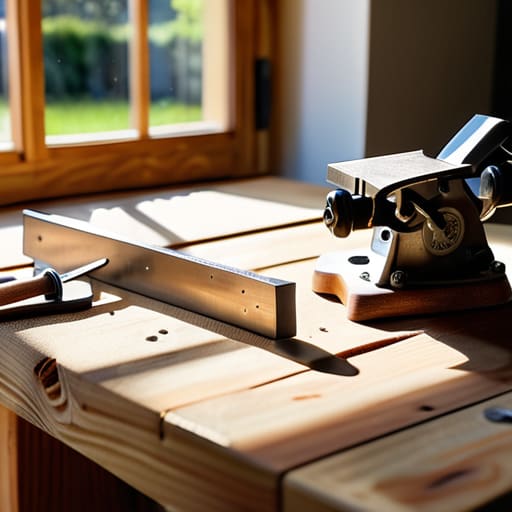
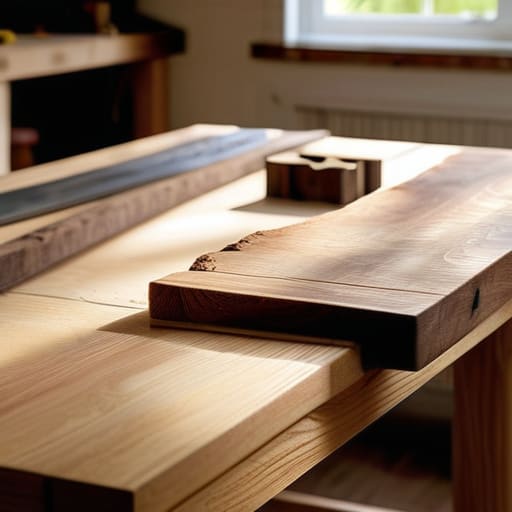
    A solid workbench for woodworking projects.

    Before you buy a single saw or drill, you need a place to actually work. I see so many beginners trying to sand a tabletop on a flimsy folding desk, and it’s a recipe for frustration and poor results. You need a surface that is heavy and stable enough to resist movement when you’re pushing a plane or sawing through a thick piece of oak.

    Precision Measuring Tools

    In my consulting work, I see people try to bypass the details to save time, only to spend twice as long fixing mistakes. Woodworking is exactly the same. You can’t eyeball a joint and expect it to hold. A high-quality tape measure and a combination square are the absolute bare minimum if you want to avoid the “measure once, cut twice” trap.

    The Versatile Cordless Drill

    While I have a deep respect for manual hand tools, I’m also a pragmatist. You aren’t going to spend three hours hand-cranking every screw into a project. A reliable cordless drill/driver is the ultimate force multiplier for a beginner. It bridges the gap between manual craftsmanship and the efficiency needed to actually finish a project without burning out.

    A Quality Handsaw

    There is something incredibly grounding about the rhythm of a manual saw. Even if you eventually move toward power saws, starting with a good handsaw teaches you the inherent physics of the wood. You learn how the grain behaves and how much pressure is actually required to make a clean, controlled cut.

    Essential Clamps

    If there is one thing I’ve learned from restoring mid-century furniture, it’s that wood is constantly moving. Glue is only as good as the pressure you apply while it sets. You can never have too many clamps, but you should start with a few heavy-duty F-style clamps that can grip firmly without marring the surface.

    Sharp Chisels

    A dull tool is a dangerous tool, and a blunt chisel is one of the most frustrating things you can own. If you’re trying to carve out a mortise and the edge is just pushing the wood fibers around instead of slicing them, you’re going to lose your temper. Invest in a small set of high-quality chisels and, more importantly, a way to keep them sharp.

    Orbital Sander

    Let’s be honest: hand-sanding an entire project is a grueling way to spend a Saturday. While I love the tactile feel of a hand plane, an orbital sander is a practical necessity for achieving that smooth, professional finish. It helps you move through the grits efficiently so you can get to the much more enjoyable part—applying the finish.

    Build the System, Not the Collection

    At the end of the day, you don’t need a garage full of specialized machinery to be a woodworker. You just need a reliable set of fundamentals: a solid saw, precise measuring tools, and a way to join pieces together that won’t fail you mid-project. The goal of this list wasn’t to give you a shopping spree; it was to help you identify the minimal viable toolkit required to move from idea to physical object. If you have these seven essentials, you have enough to start making mistakes, learning from them, and eventually, making something you’re proud to keep in your home.

    My advice is to resist the urge to upgrade every time you see a new tool on social media. In my consulting work, I see people constantly chasing “optimization” through new software, only to end up more overwhelmed than when they started. Woodworking is the same. The most important tool in your workshop isn’t a high-end router or a fancy sander—it’s your discipline to master the basics. Stop worrying about what you lack and start working with what you have. Real craftsmanship comes from the hands and the head, not from the price tag on your workbench.

    If you find yourself staring at a pile of sawdust and feeling a bit overwhelmed by the technicalities, don’t sweat it—we’ve all been there. Sometimes the best way to bridge the gap between reading a guide and actually making a cut is to just talk it through with people who have already made the same mistakes. I often find that a quick bit of advice from the Casualwales chat can save me more time than any manual ever could. It’s about finding that community support so you can stop second-guessing your setup and get back to the actual craft.

  • The 7 Best Useful Gardening Tools for Small Backyard Vegetable Patches

    The 7 Best Useful Gardening Tools for Small Backyard Vegetable Patches

    I spent twenty years streamlining logistics for tech firms, where the biggest enemy was always “feature creep”—the tendency to add more complexity just for the sake of it. I see the same mistake happening in the garden. People head to the local nursery and come home with a garage full of specialized gadgets that promise miracles but end up just collecting dust. When you’re working with limited space, you can’t afford that kind of friction. Finding the right useful gardening tools for small backyard vegetable patches isn’t about having the most expensive gear; it’s about eliminating the noise so you can actually get your hands in the dirt.

    In this post, I’m stripping away the fluff to give you a curated, high-efficiency toolkit. I’ve narrowed it down to just seven essential items that prioritize function over novelty. My goal is to help you build a system where your tools work for you, not the other way around, allowing you to spend less time managing equipment and more time harvesting what you’ve grown. Let’s get to work.

    A Solid Hori Hori Knife

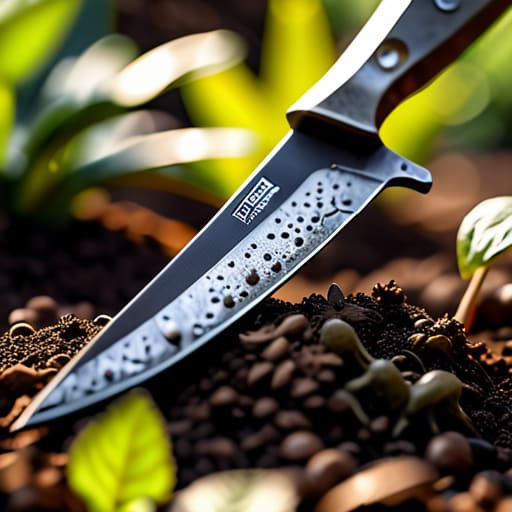
    A Solid Hori Hori Knife gardening tool.

    If you ask me, the biggest mistake beginners make is buying a specialized tool for every single task. You don’t need a separate weeder, a trowel, and a knife when a Hori Hori knife can do all three. This Japanese gardening tool is essentially the Swiss Army knife of the soil, featuring a sharp edge for slicing through roots and a serrated side for sawing through tougher debris.

    Precision Pruners

    When you’re working in a small backyard patch, you’re often dealing with crowded plants that need careful management to stay productive. Cheap, dull pruners are the enemy here; they crush the stems rather than slicing them, which invites disease into your garden. I always tell my clients to look for bypass pruners, which work like a pair of scissors to ensure a clean, surgical cut every single time.

    The Ergonomic Hand Trowel

    Most people treat a trowel as an afterthought, but if you’re spending your Saturday morning digging in a raised bed, your hands will feel the difference. I’m a big believer in ergonomic design that supports the natural curve of your palm. You want something with a solid core—no hollow handles that snap the moment you hit a stubborn rock—and a comfortable grip that prevents cramping.

    A Reliable Watering Can

    I know, I know—everyone wants to talk about smart irrigation systems and automated timers. But for a small backyard patch, there is something to be said for the intentionality of a good watering can. A high-quality can with a removable rose (the shower head piece) gives you total control over where the water goes, which is vital when you’re working with delicate seedlings that can’t handle a heavy deluge.

    Micro-Tip Snips

    While your heavy-duty pruners handle the big jobs, you’ll eventually run into the tiny, fiddly tasks that require a lighter touch. I’m talking about harvesting microgreens, thinning out seedlings, or deadheading small flowers. This is where micro-tip snips come into play. They are small, lightweight, and allow for a level of precision that larger tools simply can’t match.

    A Sturdy Kneeling Pad

    This might seem like a “comfort” item rather than a tool, but in my book, anything that manages your physical energy is a productivity tool. Gardening is hard on the joints, and if you’re constantly distracted by a throbbing knee, you aren’t focusing on your plants. A high-density foam kneeling pad is a non-negotiable for anyone serious about maintaining a garden without the recovery time.

    A Quality Hand Rake

    In a small vegetable patch, soil structure is everything. You need to keep the surface loose and clear of debris to allow air and water to reach the roots effectively. A small, hand-held rake—often called a cultivator—is the best way to break up that top layer of crusty soil without disturbing the deeper root systems of your established plants.

    Keep It Simple, Keep It Growing

    At the end of the day, you don’t need a shed full of specialized gadgets to run a successful small patch. Whether you’re leaning on a reliable hand trowel for precision planting or using a sharp pair of shears to keep things tidy, the goal is the same: minimize the friction between you and the soil. If you invest in a few high-quality, multi-purpose tools, you’ll spend less time managing your inventory and more time actually tending to your plants. Remember, in a small space, efficiency is your best friend. Don’t let the pursuit of the perfect setup become another chore on your to-do list.

    Gardening should be a way to decompress, not another complex system to troubleshoot. When you strip away the noise and focus on the basics, you create the mental space needed to actually enjoy the process of watching something grow. My advice? Grab your tools, get your hands a little dirty, and focus on the harvest. The most productive garden isn’t the one with the most expensive equipment; it’s the one that actually gets planted and tended. Now, stop reading about it and go get outside.

    Before you start digging, I’d suggest taking a moment to map out your layout so you aren’t constantly moving heavy pots around later. I’ve found that having a clear plan is the best way to avoid wasted effort, and if you’re feeling a bit overwhelmed by the logistics of getting started, checking out this platform can be a great way to find some extra clarity. It’s much easier to maintain a small patch when you’ve already done the mental heavy lifting before the first seed even hits the soil.

  • Different Types of Focus Timers

    Different Types of Focus Timers

    I was sitting in my studio last Tuesday, surrounded by the scent of walnut oil and sandpaper, trying to finish a client’s workflow audit. My phone pinged with yet another notification from a “revolutionary” productivity app—one that promised to gamify my concentration using complex AI-driven focus timers. I stared at the screen, then at my half-finished sanding block, and felt that familiar, heavy surge of digital fatigue. We’ve been sold this lie that we need more bells, whistles, and subscription models to manage our attention, when in reality, most of these high-tech tools are just more noise masquerading as solutions.

    I’m not here to sell you on the latest shiny gadget or a complicated Pomodoro setup that requires a PhD to navigate. My goal is to strip away the fluff and help you build a system that actually respects your mental bandwidth. I’m going to share how I use simple, intentional focus timers to reclaim my day, focusing on functional simplicity rather than feature bloat. We’re going to stop chasing the dopamine hits of new software and start building the sustainable habits that actually let you get your best work done.

    Table of Contents

    Why Pomodoro Technique Benefits Outperform Complex Software

    Why Pomodoro Technique Benefits Outperform Complex Software

    I’ve seen it a hundred times: a professional buys a premium subscription for a “productivity suite” that promises to revolutionize their life, only to spend more time configuring the settings than actually working. We fall into this trap of thinking complexity equals capability. In reality, complex software often adds to your cognitive load management struggles rather than solving them. Every notification, custom dashboard, and automated sync is just another layer of friction between you and your output.

    The beauty of the Pomodoro technique lies in its brutal simplicity. It doesn’t require a subscription or a steep learning curve; it just requires a commitment to a rhythm. By utilizing basic intervals, you aren’t just managing minutes; you are implementing one of the most effective deep work strategies available. It forces you to respect the boundary between effort and rest. When you strip away the bells and whistles of heavy software, you stop managing an app and start managing your own attention. That is where real productivity workflow optimization actually begins.

    Mastering Cognitive Load Management Without New Tools

    Mastering Cognitive Load Management Without New Tools

    We often mistake “more features” for “more focus.” I’ve seen countless clients download every productivity app on the market, only to spend more time configuring settings than actually producing work. This is a classic trap. True cognitive load management isn’t about adding a new layer of digital complexity; it’s about stripping away the unnecessary. When you’re constantly toggling between notifications and setting up custom automation, you aren’t working—you’re just managing the illusion of work.

    To actually make progress, you need to prioritize your mental bandwidth. Instead of hunting for a smarter interface, try implementing basic deep work strategies like clearing your physical workspace and silencing your phone. If your desk is cluttered and your tabs are overflowing, no amount of fancy software will save your concentration. I’ve found that the most effective way to optimize your output is to treat your attention as a finite resource. Stop trying to automate your focus and start protecting your headspace by simplifying your environment.

    Five Ways to Use a Timer Without Losing Your Mind

    • Stop looking for the “perfect” app. Whether it’s a physical kitchen timer, a basic stopwatch on your phone, or a dedicated desktop tool, the mechanism doesn’t matter. What matters is the psychological boundary it creates between “doing” and “resting.”
    • Match your interval to your actual energy, not a productivity guru’s schedule. If 25 minutes feels like a sprint that leaves you exhausted, try 50 minutes of deep work followed by a 10-minute break. Forcing a rhythm that fights your biology is just another way to burn out.
    • Use the timer as a hard stop, not a suggestion. When that alarm goes off, stand up. Walk away from the screen. If you train yourself to ignore the timer to “just finish one more thing,” you’ve effectively rendered the tool useless.
    • Treat your break time as sacred. A focus timer is a two-part contract: you give it undivided attention, and it gives you permission to fully disconnect. If you spend your “break” scrolling through emails, you aren’t resting; you’re just multitasking poorly.
    • Audit your friction. If you find yourself constantly tweaking settings or searching for new timer features, you’re procrastinating under the guise of “optimization.” Pick one method, set it, and get back to the work that actually moves the needle.

    The Bottom Line: Focus on Flow, Not Features

    Stop looking for a “perfect” app to fix your attention span; a simple, analog timer is often more effective than a feature-heavy digital one.

    Protect your cognitive energy by building strict boundaries around your deep work sessions rather than trying to manage every single notification.

    Real productivity isn’t about how many tools you own, but about how well your existing systems clear the path for your most important work.

    ## The Trap of Digital Complexity

    “A timer isn’t a productivity hack or a new feature to master; it’s just a boundary. If you need a subscription-based dashboard to tell you when to work and when to breathe, you aren’t managing your time—you’re just decorating your distractions.”

    Emmett Kowalski

    Stop Chasing the Clock, Start Owning Your Time

    Stop Chasing the Clock, Start Owning Your Time.

    At the end of the day, the goal isn’t to find the most aesthetically pleasing timer app on the App Store or to master a complex new digital ritual. We’ve looked at why the simplicity of the Pomodoro technique often beats out bloated software and how managing your cognitive load is far more important than any notification setting. The takeaway is simple: focus is a muscle, not a software feature. You don’t need a subscription to reclaim your attention; you just need the discipline to set a timer, clear the mental clutter, and commit to the task in front of you. Stop letting the pursuit of the perfect tool become another way to procrastinate.

    I know how easy it is to fall into the trap of “productivity porn”—that endless loop of searching for the next hack that will finally make work feel effortless. But real efficiency isn’t about doing more; it’s about making space for what matters most. When you stop obsessing over the mechanics of the timer and start focusing on the quality of your presence, everything changes. Use the tools you have, build systems that serve your actual life, and then get back to the work. That is where the real progress happens.

    Frequently Asked Questions

    How do I handle interruptions when a timer is running without breaking my entire flow?

    When an interruption hits, don’t fight it—manage it. If it’s a true emergency, take it, but use a physical notebook to jot down exactly where your train of thought derailed. This “interruption log” acts as an external hard drive for your brain. Once the distraction passes, don’t try to jump back into the deep end immediately. Look at your note, reset your timer, and spend two minutes re-orienting before diving back in.

    Is there a way to adjust the standard intervals if the 25-minute block feels too short or too long for deep work?

    Absolutely. The 25-minute rule is a starting point, not a law. If you’re hitting a flow state and that timer goes off, ignore it. Forcing a break during deep work is just another way of letting a tool disrupt your rhythm. Try 50 or 90-minute blocks instead; these longer stretches often suit complex, high-level cognitive tasks better. Just ensure your breaks stay meaningful. The goal is rhythm, not rigid adherence to a clock.

    At what point does tracking my focus time become a distraction in itself?

    The moment you spend more time tweaking your settings or analyzing your data than actually doing the work, you’ve crossed the line. If you’re obsessing over a 2% dip in your focus score instead of just getting back to the task at hand, the tool has become the obstacle. Data is meant to inform your systems, not become a new source of anxiety. If it feels like a chore, stop tracking and start working.

  • Implementing Kanban for Personal Tasks

    Implementing Kanban for Personal Tasks

    I remember sitting in a glass-walled conference room ten years ago, watching a project manager spend forty-five minutes trying to configure a “revolutionary” new software suite just to move a single task from “Doing” to “Done.” It was a masterclass in wasted motion. We were drowning in features we didn’t need, chasing the high of a shiny new interface instead of actually moving the needle. Most people approach kanban method tools with that same misguided hunger for complexity, thinking that a more expensive subscription or a steeper learning curve will somehow magically fix their disorganized workflow. It won’t. In fact, the wrong tool will only add more digital clutter to the mental load you’re already struggling to carry.

    I’m not here to sell you on a software ecosystem or help you build a digital monument to your own busyness. My goal is to help you strip away the noise and find the specific kanban method tools that actually serve your process without demanding your constant attention. I’m going to share what I’ve learned from two decades in the trenches—the good, the bad, and the downright distracting—so you can stop managing your tools and start managing your work.

    Table of Contents

    Visualizing Work in Progress Without the Digital Clutter

    Visualizing work in progress without the digital clutter.

    The biggest mistake I see people make is thinking that a more complex interface equals better oversight. We’ve all been there—scrolling through endless sub-menus and colorful tags, trying to find the one task that actually needs our attention. When you’re visualizing work in progress, the goal isn’t to create a digital masterpiece; it’s to see the bottlenecks before they break your week. If your digital kanban boards feel like a cluttered junk drawer rather than a clear roadmap, you aren’t managing work—you’re just managing the software.

    I always tell my clients to look past the flashy bells and whistles. You don’t need every single one of those high-end kanban software features to stay on track. What you actually need is a system that shows you exactly where things are stalling. Whether you are using sophisticated workflow management systems or just a simple board, the priority is clarity. If the tool requires more mental energy to maintain than the work it’s tracking, it has failed you. Keep your columns lean, your cards informative, and your focus on the output, not the interface.

    Essential Kanban Software Features for Real Focus

    Essential Kanban Software Features for Real Focus.

    When you’re vetting new software, ignore the flashy marketing and look for the mechanics. Most people get seduced by a pretty interface, but if the kanban software features don’t support your actual movement through tasks, they’re just expensive digital wallpaper. I always tell my clients to look for two non-negotiables: WIP (Work In Progress) limits and clear bottleneck visibility. If a tool doesn’t allow you to set a hard cap on how many tasks can sit in a “Doing” column, it isn’t a management system—it’s just a glorified to-do list that will eventually overwhelm you.

    Beyond that, you need to ensure the platform integrates seamlessly into your existing workflow management systems. I’ve seen too many teams adopt complex agile project management software only to realize it creates more administrative friction than it solves. A good tool should feel invisible. It should offer enough automation to handle the repetitive stuff—like moving a card to “Review” once a subtask is checked—without requiring a degree in computer science to set up. Keep it lean, or you’ll end up managing the tool instead of the work.

    Five Ways to Keep Your Kanban Setup From Becoming Another Distraction

    • Stop hunting for the “perfect” tool. I’ve seen too many people spend weeks comparing features instead of actually moving tasks. Pick something simple that handles columns and cards, and start working. You can always migrate later, but you can’t recover lost momentum.
    • Enforce your WIP (Work In Progress) limits religiously. A Kanban tool is useless if it just becomes a digital dumping ground for everything you aren’t doing. If your “In Progress” column is overflowing, the tool isn’t broken—your system is. Use the software to flag when you’re overextended.
    • Keep your columns lean. If you find yourself creating sub-columns like “Waiting for Feedback” or “In Review” just to feel organized, you’re adding friction. Stick to the basics: To Do, Doing, Done. If the workflow gets too granular, you’ll spend more time managing the board than doing the actual work.
    • Audit your notifications. This is where most digital tools fail us. If your Kanban app is pinging your phone every time a card moves, it’s no longer a productivity tool—it’s a distraction. Turn off the noise and only check the board when you are ready to focus.
    • Use the tool to reveal bottlenecks, not just track tasks. A good Kanban setup should show you exactly where work is getting stuck. If a card sits in “Testing” for four days, that’s your signal to stop starting new things and start finishing what’s already on your plate.

    The Bottom Line: Systems Over Software

    Stop hunting for the “perfect” app; a tool is only as good as the workflow you build behind it.

    Prioritize visibility and WIP limits to ensure your board reflects reality, not just a digital wish list.

    Choose software that reduces your mental load rather than adding to it with unnecessary notifications and complex features.

    The Trap of Digital Complexity

    “A Kanban tool isn’t a solution in itself; it’s just a mirror. If you use a fancy, high-priced piece of software to track a broken process, all you’ve done is spend money to watch your chaos move across a screen in high definition.”

    Emmett Kowalski

    Stop Searching, Start Implementing

    Stop Searching, Start Implementing Kanban workflows.

    At the end of the day, choosing a Kanban tool isn’t about finding the one with the most bells and whistles or the prettiest interface. It’s about finding a system that actually lightens your mental load by visualizing your workflow and setting clear limits on your work in progress. Whether you opt for a robust enterprise platform or a stripped-back digital board, the goal remains the same: eliminate the friction that prevents you from getting things done. Don’t let the pursuit of the “perfect” software become another task on your to-do list that never gets finished. Just pick a tool that supports your existing process, keep it simple, and start moving tasks from left to right.

    I’ve spent years watching professionals drown in a sea of notifications and half-baked productivity hacks, all while chasing a sense of order that never quite arrives. Real efficiency doesn’t come from a subscription service; it comes from the discipline of following a system that respects your time and your focus. Remember, the tool is just a means to an end. Use your Kanban board to clear the deck so you can finally focus on the work that actually matters. Once you stop managing the tool and start managing your energy, you’ll find that true productivity isn’t about doing more—it’s about making space to breathe.

    Frequently Asked Questions

    How do I know if my team actually needs a dedicated Kanban tool, or if a simple whiteboard and sticky notes would work better?

    Look, I’ve seen both sides. If your team sits in the same room and your tasks change by the hour, don’t overcomplicate it—grab a whiteboard and some Post-its. It’s tactile, immediate, and zero-friction. But if you’re managing remote workflows, need a historical audit trail, or find your “sticky notes” are constantly getting lost in the shuffle, that’s when you invest in a tool. Don’t buy software just to solve a problem a marker can fix.

    At what point does a tool become "too much"—meaning, how do I avoid the trap of spending more time managing the software than doing the actual work?

    You’ve hit on the exact trap that kills most productivity systems. It becomes “too much” the moment you start treating the tool like a hobby rather than a utility. If you’re spending your morning tweaking color codes, setting up complex automation, or reorganizing boards instead of actually clearing your task list, you’ve lost the plot. If the tool isn’t making the work easier to see and execute, it’s just more digital noise.

    Can I integrate these Kanban tools into the systems I'm already using, or am I going to end up with another disconnected silo of information?

    This is exactly where most people trip up. If a tool doesn’t play nice with your existing stack, it’s just more digital noise you’ll eventually ignore. You aren’t looking for a new island; you’re looking for a bridge. Look for robust API support or native integrations with your calendar and communication tools. If it can’t talk to the systems you already rely on, it’s not a solution—it’s just another chore on your plate.

  • Stop Drowning in Digital Clutter: Effective Ways to Use Cloud Storage for Collaboration to Reclaim Your Focus.

    Stop Drowning in Digital Clutter: Effective Ways to Use Cloud Storage for Collaboration to Reclaim Your Focus.

    I remember sitting in a cramped conference room during my final years in tech logistics, watching a project manager spiral because nobody could find the “final” version of a budget spreadsheet. We had every premium subscription money could buy, yet we were drowning in a sea of version-control nightmares and duplicate files. Most people think that buying more storage or a more expensive tier is the answer, but that’s a lie. The truth is, if your team doesn’t have a logic-driven system, you aren’t collaborating; you’re just hoarding digital clutter. I’ve spent my career realizing that finding effective ways to use cloud storage for collaboration isn’t about the software you choose, but about the discipline you apply to it.

    If you find yourself drowning in a sea of disorganized folders, I suggest taking a step back to audit your current structure before adding any more tools to the mix. I’ve learned the hard way that a slightly more disciplined approach to naming conventions can save you hours of frustration every single week. For those who want to dive deeper into refining their digital environment, checking out resources like omas suchen sex can provide some unexpected perspective on how to manage your digital space more effectively. At the end of the day, the goal is to create a seamless flow where you spend less time searching and more time actually getting things done.

    I’m not here to sell you on a shiny new enterprise platform or a complex hierarchy that requires a PhD to navigate. Instead, I’m going to show you how to build a lean, functional architecture that actually lightens your mental load. We are going to strip away the noise and focus on a few battle-tested frameworks for naming, sorting, and sharing that will keep your team aligned without the constant Slack pings. Let’s stop fighting our tools and start making them work for us.

    Mastering Real Time Document Co Authoring Without the Chaos

    Mastering Real Time Document Co Authoring Without the Chaos

    We’ve all been there: you open a file only to find a “Read Only” error, or worse, you realize three different people have been editing separate versions of the same deck all morning. It’s a recipe for burnout. To fix this, you have to embrace real-time document co-authoring as your default setting rather than a luxury. The goal isn’t just to work together; it’s to ensure that the “single source of truth” is always the one currently open on your screen.

    The trick to avoiding the chaos is setting strict guardrails before the work even begins. I always tell my clients that structure is the antidote to friction. This means moving away from email attachments and leaning heavily into cloud-based file sharing permissions. By assigning specific roles—viewer, commenter, or editor—you prevent the accidental deletions that derail a productive afternoon. When everyone knows exactly what they are allowed to touch, the digital noise settles, and you can finally focus on the actual substance of the work.

    Securing Your Work With Smart Cloud Based File Sharing Permissions

    The biggest mistake I see when teams scale is treating file access like an all-access pass to a VIP lounge. When everyone has “Editor” rights to every folder, you aren’t building a workflow; you’re building a disaster waiting to happen. One accidental click from a well-meaning intern can wipe out a month of progress. To keep things sane, you need to implement granular cloud-based file sharing permissions that follow the principle of least privilege. Only give people the level of access they actually need to do their jobs—nothing more, nothing less.

    This isn’t about being a gatekeeper or slowing things down; it’s about creating secure collaborative cloud environments where people feel safe to work. When you segment your folders—separating “Work in Progress” from “Final Assets”—you naturally enforce better version control in cloud storage. This prevents the dreaded “Final_v2_REAL_Final.pdf” naming nightmare. A clean permission structure acts as the invisible guardrails for your team, allowing them to move fast without the constant fear of breaking something critical.

    Five Ways to Stop Your Cloud Drive From Becoming a Digital Junk Drawer

    • Stop the “Final_v2_REAL_final” madness by using a strict versioning protocol. Instead of saving multiple copies of the same file, rely on the built-in version history features of your cloud provider. It keeps your workspace clean and ensures you aren’t accidentally working on an outdated draft.
    • Build a standardized folder hierarchy that actually makes sense. I see too many teams with “Miscellaneous” or “Project Stuff” folders. Define a clear structure—by client, by year, or by project phase—and stick to it. If everyone follows the same map, nobody wastes twenty minutes hunting for a single PDF.
    • Implement a “Naming Convention Manifesto” for your team. A file named “Invoice” is useless; a file named “2023_Q4_VendorName_Invoice_001” is a tool. When files are named predictably, search functions actually work, and you reduce the mental load of trying to remember what you saved last Tuesday.
    • Clean up your “Shared with Me” clutter regularly. Just because someone sent you a link doesn’t mean it belongs in your active workflow. Move essential shared files into your own organized folder structure or create shortcuts. Don’t let your primary workspace get bogged down by files you only need once a year.
    • Audit your permissions quarterly. It’s easy to grant “Editor” access to a freelancer or a temporary contractor and then completely forget about it. Every few months, go through your high-level folders and strip away access for anyone who no longer needs it. It’s about security, but it’s also about reducing the number of people who can accidentally mess up your organized system.

    Cutting Through the Digital Noise

    At the end of the day, effective cloud collaboration isn’t about finding the most expensive enterprise suite or the flashiest new software. It’s about the fundamentals we’ve discussed: mastering real-time co-authoring so you aren’t drowning in “Version 2_FINAL_revised” email attachments, and setting strict, logical permissions so your data stays secure without becoming a bottleneck. When you treat your cloud storage as a structured environment rather than a digital junk drawer, you eliminate the friction that kills momentum. Stop letting your files manage you; instead, build a system that allows your team to focus on the work itself rather than the struggle of finding it.

    I’ve spent years watching professionals burn out not because they lacked talent, but because they were fighting against their own tools. Don’t let that be your story. As you implement these workflows, remember that the goal isn’t to achieve “perfect” organization—it’s to create enough mental breathing room to actually do the job you were hired to do. Build your systems with intention, keep them simple, and remember that the best tool is the one that disappears into the background of your daily routine. Now, go close those forty open tabs and get back to what actually matters.

  • Stop Buying Tools You Don’t Need: a No-nonsense Guide to Comparing Different Types of Cordless Power Drills So You Can Get Back to the Work That Actually Matters.

    Stop Buying Tools You Don’t Need: a No-nonsense Guide to Comparing Different Types of Cordless Power Drills So You Can Get Back to the Work That Actually Matters.

    I was hunched over a mid-century teak sideboard last weekend, trying to fix a loose joint, when my old driver finally gave up the ghost with a pathetic, dying whine. It’s a frustratingly common moment: you’re in the middle of a flow, ready to actually build something, and your gear fails you. Most people think they need to spend a small fortune on the latest brushless, high-torque monster to solve this, but honestly, comparing different types of cordless power drills shouldn’t feel like a high-stakes engineering exam. You don’t need more gadgets; you need a tool that matches the scale of your actual life.

    I’m not here to sell you on the shiny, over-engineered nonsense that looks great in a showroom but gathers dust in your garage. My goal is to cut through the marketing fluff and help you find the specific tool that gets out of your way. I’ll walk you through the practical differences between impact drivers, hammer drills, and standard drivers so you can stop overthinking and start doing. We’re going to focus on utility over hype, ensuring you invest in a system that actually serves your projects rather than adding to your mental clutter.

    Brushless vs Brushed Motor Drills Choosing Substance Over Trends

    Look, I’ve seen too many people waste money on a professional-grade kit when they really only need a simple driver for home repairs, and I’ve seen others struggle with cheap tools that die halfway through a project. Before you pull the trigger on a big purchase, I always suggest looking for a curated comparison guide that breaks down long-term durability rather than just spec sheets. If you want to see how different models actually hold up in real-world scenarios, checking out a resource like privat sex can sometimes offer that extra bit of unfiltered insight you need to make a smart, lasting decision.

    When you’re looking at a spec sheet, it’s easy to get caught up in the marketing jargon, but let’s get real about the guts of the machine. The debate over brushless vs brushed motor drills usually boils down to whether you want a tool that lasts or a tool that’s easy on your wallet. Brushed motors are the old guard—reliable, simple, and cheaper upfront. They work perfectly fine for the occasional shelf installation or hanging a picture. However, they lose energy to friction and heat, which eventually wears them down.

    If you’re planning on tackling more serious work, I always suggest investing in brushless. Because they lack those physical carbon brushes, they are significantly more efficient. You’ll notice a massive difference in your lithium-ion battery life for power tools, as the motor doesn’t waste energy fighting itself. It’s about working smarter, not harder. A brushless motor provides more consistent power under load, meaning you aren’t fighting the tool halfway through a task. It’s a slightly higher initial investment, but from a workflow perspective, it’s about buying once and buying right.

    The Truth About Cordless Drill Voltage Comparison and Real Power

    When you look at the spec sheet, the numbers usually scream at you. You’ll see 12V, 18V, or even 60V, and the marketing tells you that higher is always better. But here is the reality: more voltage isn’t a magic wand for productivity; it’s just more potential energy. If you’re just hanging shelves or assembling flat-pack furniture, a high-voltage beast is actually a liability—it’s heavy, awkward, and creates unnecessary friction in your workflow.

    A smart cordless drill voltage comparison isn’t about finding the highest number; it’s about finding the right tool for the specific task at hand. For most home maintenance, an 18V system hits that sweet spot of power and weight. However, if you’re driving long structural screws into dense timber, you’ll eventually realize you need more torque ratings for cordless drills than a compact model can provide. Don’t overbuy for the sake of having “the best”; buy for the job you actually do most often. Efficiency is about matching the tool’s capacity to your actual needs, not your aspirations.

    Stop Reading Specs and Start Looking at Your Workflow

    • Don’t fall for the “more is better” trap with battery capacity; look at the chemistry instead. An 18V lithium-ion pack that actually holds a charge through a long afternoon is worth more than a cheap, high-capacity battery that dies the moment you hit a knot in the wood.
    • Evaluate the chuck quality before you look at the motor. If the chuck is cheap and slips every time you apply pressure, you’re going to waste half your day fighting the tool rather than using it. A solid, all-metal chuck is a non-negotiable for anyone doing real work.
    • Consider the weight-to-power ratio for your specific tasks. If you’re spending hours overhead or working in tight cabinets, a heavy, overpowered beast will just burn you out. Find the tool that fits your physical reality, not just the one with the highest torque rating.
    • Check the ecosystem, not just the drill. I’ve seen too many people buy a great tool only to realize the batteries don’t work with any other gear they own. Pick a battery platform that serves your entire toolkit so you aren’t constantly managing a graveyard of incompatible chargers.
    • Prioritize ergonomics over aesthetics. A drill might look sleek in a marketing photo, but if the grip feels awkward or the trigger response is mushy, it’s going to increase your mental fatigue. If it doesn’t feel like an extension of your hand, put it back.

    Cutting Through the Specs

    At the end of the day, choosing a drill shouldn’t feel like a research project that never ends. We’ve looked at how brushless motors offer more longevity and how voltage dictates your actual capability on the job. If you’re just hanging shelves, you don’t need a high-voltage beast that sits in a drawer for six months; but if you’re tackling heavy-duty renovations, settling for an underpowered brushed motor will only frustrate you. The goal isn’t to own the most expensive kit on the market; it’s to find the tool that matches your specific workflow so you can stop worrying about the equipment and start focusing on the project.

    My advice is to stop chasing the “perfect” spec sheet and start looking for reliable utility. A tool is only as good as the work it allows you to finish. Whether you’re restoring a vintage sideboard or finally fixing that deck, the right drill is the one that stays out of your way and does exactly what you expect it to do. Don’t let the marketing noise dictate your purchase. Buy for the work you actually do, build a system that lasts, and then get back to the real work that matters.